To improve your website performance one of the things you should consider doing is optimizing the images. By reducing the size of the images you reduce the loading times on your website and lower the bandwidth usage on your hosting package. You can use the GIMP to optimize your images for web sites, will assume you have already installed GIMP and opened the image.
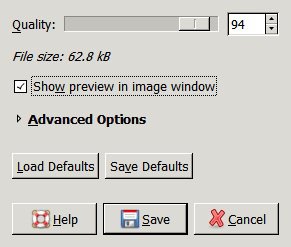
The real trick to improve you image size with JPEG happens when saving as a JPEG tick the “Show preview in image window” box and then click on “Advanced Options” to expand the tab.

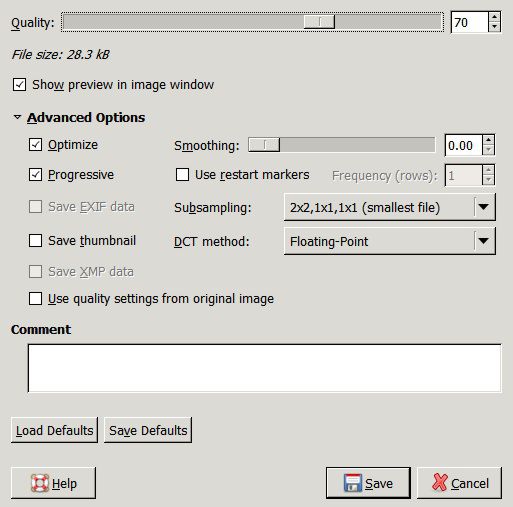
Under advanced options you will notice there is a quality bar and several options available. You will also see the current File Size. The goal is to find the smallest file size without sacrificing too much image quality. You should only have “Optimize” and “Progressive” ticked for web page images. Subsampling, you need to fiddle a bit here and see how low you can go without losing image quality. On most images you will not notice any difference setting it to “smallest file” however you may in some cases need to leave it on “best quality” Remeber Progressive sets the image to load in stages which is very helpful for websites.
Adjust the quality bar carefully while keep an eye on the image preview if you notice the visible image quality getting to low move it up a little until you find a balance that you are happy with. Remember the smaller the file size the faster it will load on your web site but you don’t want the image to look terrible either. Adjusting the smoothing up slightly can improve the appearance of some images as well. It will take a few tries to get used to the best balance here.

And there you have it, the easy way to improve you image loading times on websites and the the end of this guide “How to optimize images for web sites using the GIMP”